Restrict access to internal apps and staging environments
Every cluster accumulates services that were never meant for the public internet: a staging copy of the product, an internal admin panel, a metrics dashboard, a queue console, the preview environment for a pull request. They get an Ingress and a hostname because that is the convenient way to share them, and then they sit there, reachable by anyone who finds the URL.
This guide covers how to put an authentication layer in front of those services. It starts with the options, because the right answer genuinely differs by team, and then deploys the one that generalises best: an identity-aware proxy using oauth2-proxy, a CNCF project, with Google Workspace as the identity provider.
Why this matters
The usual reasoning for leaving an internal service open is that nobody knows the URL. That does not hold up:
- Hostnames are public. Every certificate issued by a public CA is published to Certificate Transparency logs. The moment cert-manager gets a certificate for your staging hostname, that name is in a public, searchable append-only log. Scanners watch those logs continuously.
- Staging holds real data more often than anyone admits. Production dumps get restored into staging to reproduce bugs. The access controls that protect that data in production are rarely reproduced alongside it.
- Non-production environments are weakly patched. They run older builds, debug endpoints stay enabled, and stack traces are verbose by design.
- It is a foothold. An internal dashboard usually holds credentials, connection strings or tokens for something else.
The goal is not perfect security for a staging environment. It is making sure that reaching it requires being someone in your organisation, so a scan of Certificate Transparency logs turns up a login screen rather than your admin panel.
What your options are
The approaches fall into five groups. They are not mutually exclusive, and the last two are the ones worth building on.
Do not expose it at all
Keep the service on a ClusterIP and reach it through the Kubernetes API:
kubectl port-forward -n demo svc/internal-app 8080:80Access is governed by cluster RBAC, so there is no new authentication system and nothing is published. It works well for a service that engineers with cluster access use occasionally.
It stops working as soon as the audience widens. A designer reviewing a staging build, a support engineer checking a queue, or anyone who should not hold cluster credentials cannot use it. It also breaks OAuth callbacks, webhooks and anything that needs a stable public hostname. Related: a LoadBalancer service can be made internal-only with networking.cfke.io/load-balancer-type: Internal, which keeps it off the public internet but still requires network access to reach.
IP allow lists
Restrict the Ingress to known source addresses:
nginx.ingress.kubernetes.io/whitelist-source-range: "203.0.113.0/24,198.51.100.7/32"Simple, effective, and it costs nothing to run. It is a good fit when access comes from a small set of fixed egress points, like an office or a VPN concentrator, and it composes well with everything below as a second layer.
The problem is home broadband and mobile networks, where addresses rotate. Maintaining the list becomes a recurring chore, and the usual failure mode is a range added during an incident that nobody removes for two years. It also authenticates a network location, not a person, so it tells you nothing about who did what.
Shared credentials (basic auth)
A username and password on the Ingress:
nginx.ingress.kubernetes.io/auth-type: basic
nginx.ingress.kubernetes.io/auth-secret: basic-auth
This is the fastest thing to set up, and for throwaway preview environments it is often proportionate.
It does not scale past a handful of people. The password is shared, so it is in a group chat somewhere, it does not get rotated when someone leaves, and every request is anonymous. There is no way to answer “who deleted that record” from an access log. Treat it as a speed bump, not access control.
Network-level access: VPN and mesh
Put the service on a private network and require clients to join it, with WireGuard®, Tailscale, Netbird or a cloud VPN gateway. Nothing is exposed publicly at all, and it protects every protocol, not just HTTP: databases, SSH and internal APIs all come along.
The costs are client software on every device and an enrolment process for new joiners. Contractors and non-technical users are where it usually gets awkward, and mesh VPNs authenticate a device rather than a person in a browser session.
This is a strong option and complementary to what follows. It gets its own tutorial, so it is only summarised here.
Identity-aware proxy
Put a proxy in front of the service that requires a login with your existing identity provider before any request reaches the application. The application does not change, and it never sees an unauthenticated request. Because it uses the identity provider you already run, offboarding is automatic: revoke the account and access to every protected service goes with it.
The managed versions are Cloudflare Access, Google IAP and Azure AD Application Proxy. If you already route through Cloudflare, Cloudflare Access is a compelling option: the enforcement happens at their edge, so traffic is filtered before it reaches your cluster, and the free tier covers up to 50 users. The trade is that your internal traffic depends on that vendor.
The open-source version, and the subject of this guide, is oauth2-proxy. It runs in your cluster, speaks OpenID Connect to any identity provider, and integrates with the NGINX Ingress Controller through the auth-url mechanism, so protecting an application is three annotations rather than a code change.
How to decide
Work down this list and stop at the first match.
- Only engineers with cluster access need it, occasionally. Use
kubectl port-forward. Do not build anything. - It is a throwaway preview environment and the audience is a handful of people. Basic auth is proportionate. Do not let it become the standard.
- All access comes from fixed egress addresses. An IP allow list is the cheapest control that works. Add one of the below when that stops being true.
- You need non-HTTP services too, like databases or SSH. Use a VPN or mesh network. An identity-aware proxy only handles HTTP.
- People need browser access to internal web apps, and you have an identity provider. Use an identity-aware proxy. Cloudflare Access if you are already on Cloudflare, oauth2-proxy if you would rather keep it in your cluster and not add a dependency.
The two common mistakes: standardising on basic auth because the first service was easy to set up, and reaching for a full VPN rollout when the actual requirement was browser access to three web applications.
What you will build
The end state is one hostname serving both the application and the proxy, with sign-in handled by Google:
flowchart TD
    Client([Client]) --> LB["Hetzner Cloud<br/>Load Balancer"]
    LB --> Ingress["NGINX Ingress<br/>Controller"]
    Ingress -->|auth_request| Proxy["oauth2-proxy"]
    Proxy -->|"no session: 302"| Google["Google Workspace"]
    Proxy -->|"valid session: 202"| App["internal-app"]
For every request, the Ingress Controller makes a subrequest to oauth2-proxy. If the request carries a valid session cookie, oauth2-proxy returns 202 and NGINX proxies to the application. If not, NGINX returns a redirect to the sign-in page, and the user is sent through Google.
oauth2-proxy is deployed once and shared by everything it protects, so there is one OAuth client to register with Google and one place to change policy.
The application and oauth2-proxy sit on the same hostname: the application at /, oauth2-proxy under a path prefix. That keeps the whole setup on one name, which means no DNS records and no domain of your own.
Prerequisites
- A running CFKE cluster with a fleet attached. See the getting started guide if you need one. This guide uses nodes on Hetzner Cloud, which provisions a Hetzner Cloud Load Balancer for
LoadBalancerservices. - The NGINX Ingress Controller and cert-manager installed, with a working
letsencrypt-prodClusterIssuer. Follow Expose HTTP applications with NGINX Ingress if you have not done this. - A Google Workspace account with permission to create OAuth clients in Google Cloud Console.
kubectlandhelmon your local machine.
You do not need a domain of your own. CFKE assigns every LoadBalancer Service a stable public hostname, and the NGINX Ingress Controller you installed as a prerequisite has one:
<service-name>.<namespace>.<cluster-id>.<control-plane-region>.cfke.cloudfleet.devFill in your own cluster ID and control plane region:
ingress-nginx-controller.ingress-nginx.<cluster-id>.<region>.cfke.cloudfleet.devIt resolves publicly and Let’s Encrypt issues certificates for it, so it is enough to complete this guide on its own.
Everything below uses this hostname, written with
<cluster-id>and<region>still in it. Replace those two, and nothing else. If you would rather use your own domain, substitute your name for the whole hostname wherever it appears.
If you prefer a name on your own domain, point a CNAME at the CFKE hostname and use your name instead. Do not use an A record to the load balancer IP: with externalTrafficPolicy: Local, CFKE provisions the load balancer in the region where the backing pods run, so consolidation moving the ingress controller to another region replaces the load balancer and changes the IP. The CFKE hostname follows that move; an A record silently breaks. See load balancer issues.
Step 1: Deploy an application to protect
Any HTTP service works. This one is a plain NGINX that prints the identity headers it receives, which makes it easy to confirm the proxy is doing its job.
apiVersion: v1
kind: Namespace
metadata:
  name: demo
---
apiVersion: v1
kind: ConfigMap
metadata:
  name: internal-app-content
  namespace: demo
data:
  default.conf: |
    server {
      listen 8080;
      server_name _;
      location / {
        default_type text/html;
        return 200 '<!doctype html>
    <html><head><title>Staging environment</title></head>
    <body style="font-family:system-ui;max-width:40rem;margin:4rem auto">
    <h1>Internal staging environment</h1>
    <p>If you can read this, you passed the identity-aware proxy.</p>
    <p><b>Signed in as:</b> $http_x_auth_request_email</p>
    </body></html>';
      }
      location /healthz {
        access_log off;
        return 200 "ok\n";
      }
    }
---
apiVersion: apps/v1
kind: Deployment
metadata:
  name: internal-app
  namespace: demo
spec:
  replicas: 2
  selector:
    matchLabels:
      app: internal-app
  template:
    metadata:
      labels:
        app: internal-app
    spec:
      containers:
        - name: nginx
          image: nginx:1.27-alpine
          ports:
            - containerPort: 8080
          volumeMounts:
            - name: conf
              mountPath: /etc/nginx/conf.d
          resources:
            requests: {cpu: 50m, memory: 64Mi}
            limits: {memory: 128Mi}
          readinessProbe:
            httpGet: {path: /healthz, port: 8080}
      volumes:
        - name: conf
          configMap:
            name: internal-app-content
---
apiVersion: v1
kind: Service
metadata:
  name: internal-app
  namespace: demo
spec:
  selector:
    app: internal-app
  ports:
    - port: 80
      targetPort: 8080
Save it as internal-app.yaml and apply it:
kubectl apply -f internal-app.yamlResource requests are set on the container because CFKE sizes and provisions nodes from them. Omitting them triggers the resource-requests-are-not-set admission warning, which does not block the deployment but leaves the node auto-provisioner guessing.
Step 2: Expose it, and see the problem
Keep the hostname to hand, since the manifests and commands below all refer to it:
export APP_HOST="ingress-nginx-controller.ingress-nginx.<cluster-id>.<region>.cfke.cloudfleet.dev"
echo "$APP_HOST"
Create an Ingress with TLS but no authentication:
apiVersion: networking.k8s.io/v1
kind: Ingress
metadata:
  name: internal-app
  namespace: demo
  annotations:
    cert-manager.io/cluster-issuer: letsencrypt-prod
spec:
  ingressClassName: nginx
  tls:
    - hosts:
        - ingress-nginx-controller.ingress-nginx.<cluster-id>.<region>.cfke.cloudfleet.dev
      secretName: internal-app-tls
  rules:
    - host: ingress-nginx-controller.ingress-nginx.<cluster-id>.<region>.cfke.cloudfleet.dev
      http:
        paths:
          - path: /
            pathType: Prefix
            backend:
              service:
                name: internal-app
                port:
                  number: 80
Save it as internal-app-ingress.yaml and apply it:
kubectl apply -f internal-app-ingress.yamlNo DNS work is needed. The hostname already resolves to the load balancer, which you can confirm:
kubectl get svc -n ingress-nginx ingress-nginx-controller
dig +short "$APP_HOST"
Once the certificate is issued, the application answers:
curl -s -o /dev/null -w '%{http_code}\n' "https://$APP_HOST/"
# 200
That 200 is the problem. So does everyone else’s curl. The certificate that made this work also published the hostname to Certificate Transparency logs.
Step 3: Create a Google OAuth client
oauth2-proxy authenticates people against your identity provider rather than holding its own user list. With Google Workspace, that means registering an OAuth client so Google knows which application is asking and where it is allowed to send people back to.
All of this happens in Google Cloud Console, under Google Auth Platform. The project you use does not need to run any infrastructure; it exists only to own the OAuth client. On a project where nothing has been configured yet, the section opens with a Get started prompt that walks through the first few fields.
Configure the consent screen
The consent screen settings live across three pages in the left-hand navigation.
Branding holds the application name and user support email. These are what your colleagues see on the Google sign-in screen, so name it after the thing you are protecting rather than after oauth2-proxy.
Audience holds the User type, and this is the setting that matters most. Choose Internal.
Internal restricts sign-in to accounts in your Workspace organisation, enforced by Google before a request ever reaches your cluster. External would allow any Google account to complete the sign-in, leaving email_domains in oauth2-proxy as the only thing standing between a personal Gmail account and your staging environment. Defence in depth is the point: set both. Internal also skips Google’s app verification process, which External would otherwise require.
Data access holds the requested scopes. oauth2-proxy needs only email, profile and openid, which are the defaults, so there is nothing to add here.
Create the client
Go to Google Auth Platform → Clients, choose Create client, and select an Application type of Web application.
Under Authorised redirect URIs, add exactly one entry, using your own hostname:
https://ingress-nginx-controller.ingress-nginx.<cluster-id>.<region>.cfke.cloudfleet.dev/_cfke-oauth2-proxy/callbackThree things to get right here:
- The path is
/_cfke-oauth2-proxy/callback, matching theproxy_prefixset in the next step. oauth2-proxy’s default prefix is/oauth2; this guide moves it out of the application’s way, and Google has to be told the same path. - The host is the one users visit, because oauth2-proxy is served from that prefix on the same host. If you are using the CFKE hostname, this is the long
…cfke.cloudfleet.devname in full. - Google matches redirect URIs exactly, including scheme and trailing slash. A mismatch produces
Error 400: redirect_uri_mismatchat sign-in.
You can leave Authorised JavaScript origins empty. oauth2-proxy uses the server-side authorisation code flow, so no browser-side token exchange takes place.
Collect the credentials
Google shows a Client ID and a Client secret once the client is created. Keep both; the next step puts them into the oauth2-proxy configuration.
The client secret is a credential. In a real deployment, hold it in a Kubernetes Secret managed by External Secrets Operator or a similar tool rather than committing it to a values file in Git.
Step 4: Install oauth2-proxy
oauth2-proxy needs a cookie secret to sign session cookies. It must be 16, 24 or 32 bytes, base64-encoded:
python3 -c "import secrets,base64; print(base64.urlsafe_b64encode(secrets.token_bytes(32)).decode())"Create oauth2-proxy-values.yaml, substituting your client ID, client secret, cookie secret and domain:
config:
  clientID: "YOUR_CLIENT_ID.apps.googleusercontent.com"
  clientSecret: "YOUR_CLIENT_SECRET"
  cookieSecret: "YOUR_COOKIE_SECRET"
  configFile: |-
    provider = "google"

    # Only accept identities from your Workspace domain.
    email_domains = [ "example.com" ]

    # oauth2-proxy is an auth backend here, not a proxy to an application.
    # Authenticated subrequests get a 202 and NGINX takes it from there.
    upstreams = [ "static://202" ]

    # Trust X-Forwarded-* from the Ingress Controller.
    reverse_proxy = true

    # Expose the identity to the Ingress as X-Auth-Request-* headers.
    set_xauthrequest = true

    # Go straight to Google instead of showing a "Sign in with Google" button.
    skip_provider_button = true

    # Serve oauth2-proxy's own endpoints from a prefix the application is
    # unlikely to want. The default, /oauth2, collides with applications
    # that are themselves OAuth clients or providers.
    proxy_prefix = "/_cfke-oauth2-proxy"

    # The proxy and the application share a hostname, so the session cookie is
    # host-only: no cookie_domains needed, and nothing else can read it.
    # cookie_secure keeps it off plaintext connections.
    cookie_secure = true

resources:
  requests: {cpu: 10m, memory: 64Mi}
  limits: {memory: 128Mi}

ingress:
  enabled: true
  className: nginx
  hosts:
    # Must be the same hostname as the application, so one session cookie covers both.
    - ingress-nginx-controller.ingress-nginx.<cluster-id>.<region>.cfke.cloudfleet.dev
  path: /_cfke-oauth2-proxy
  pathType: Prefix
The Ingress here claims /_cfke-oauth2-proxy on the same host as the application, and must match proxy_prefix exactly. NGINX matches the longest prefix, so /_cfke-oauth2-proxy/... reaches oauth2-proxy and everything else reaches the application.
Any prefix works as long as the two agree. The leading underscore marks it as infrastructure rather than an application route, and the name says what owns it. Moving off the default leaves /oauth2 free for the application, which matters when the thing you are protecting is itself an OAuth client or provider.
Note that it declares no TLS block and no cert-manager annotation. An Ingress can only reference a TLS secret in its own namespace, and oauth2-proxy lives in a different namespace from the application, so the two cannot share one. They do not need to: the certificate requested by the application’s Ingress in Step 2 already covers this hostname, and NGINX selects a certificate by the hostname the client asked for rather than by which Ingress matched the path. Adding a TLS block here would issue a second certificate for the same name to no benefit.
Put your own Workspace domain in
email_domains.You cannot leave it out: oauth2-proxy refuses to start without either
email_domainsorauthenticated_emails_file, and exits withmissing setting for email validation. That error also suggests a wildcard that authorises every address the provider returns. Do not take that shortcut to make the crash stop.What it would cost you depends on the consent screen from Step 3. Set to Internal, Google only ever returns accounts from your organisation, so you would be down to one control instead of two. Set to External, Google authenticates any Google account in existence, and a wildcard here means anyone with a Gmail address reaches the application. The proxy would be doing exactly what it was told: authenticating people, and authorising all of them.
Install it:
helm repo add oauth2-proxy https://oauth2-proxy.github.io/manifests
helm repo update oauth2-proxy

helm upgrade --install oauth2-proxy oauth2-proxy/oauth2-proxy \
  -n oauth2-proxy --create-namespace \
  -f oauth2-proxy-values.yaml
Confirm it is running and correctly rejecting anonymous requests:
kubectl get pods -n oauth2-proxy
curl -s -o /dev/null -w '%{http_code}\n' "https://$APP_HOST/_cfke-oauth2-proxy/auth"
# 401
A 401 here is the correct answer: no session cookie, no access. This is the endpoint the Ingress Controller will call on every request.
Step 5: Protect the Ingress
Three annotations connect the application to the proxy. Update the Ingress from Step 2:
apiVersion: networking.k8s.io/v1
kind: Ingress
metadata:
  name: internal-app
  namespace: demo
  annotations:
    cert-manager.io/cluster-issuer: letsencrypt-prod
    nginx.ingress.kubernetes.io/auth-url: "http://oauth2-proxy.oauth2-proxy.svc.cluster.local/_cfke-oauth2-proxy/auth"
    nginx.ingress.kubernetes.io/auth-signin: "https://$best_http_host/_cfke-oauth2-proxy/start?rd=$escaped_request_uri"
    nginx.ingress.kubernetes.io/auth-response-headers: "X-Auth-Request-User,X-Auth-Request-Email,X-Auth-Request-Preferred-Username"
spec:
  ingressClassName: nginx
  tls:
    - hosts:
        - ingress-nginx-controller.ingress-nginx.<cluster-id>.<region>.cfke.cloudfleet.dev
      secretName: internal-app-tls
  rules:
    - host: ingress-nginx-controller.ingress-nginx.<cluster-id>.<region>.cfke.cloudfleet.dev
      http:
        paths:
          - path: /
            pathType: Prefix
            backend:
              service:
                name: internal-app
                port:
                  number: 80
What each one does:
auth-urlis the subrequest NGINX makes before serving anything. It uses the in-cluster service address, so the check never leaves the cluster and adds no public round trip.auth-signinis where unauthenticated users get redirected.$best_http_hostresolves to whatever host the request came in on, so this annotation is identical on every application you protect and needs no editing. Therdparameter carries the originally requested path so people land where they were going rather than on a home page.auth-response-headerscopies the identity from the auth subrequest into the request forwarded upstream. This is how the application learns who is signed in.
Apply it:
kubectl apply -f internal-app-ingress.yamlStep 6: Test it
An unauthenticated request should now be redirected instead of served:
curl -s -o /dev/null -w '%{http_code} -> %{redirect_url}\n' "https://$APP_HOST/"302 -> https://ingress-nginx-controller.ingress-nginx.<cluster-id>.<region>.cfke.cloudfleet.dev/_cfke-oauth2-proxy/start?rd=%2FFollow the chain to confirm it ends at Google:
curl -s -L -o /dev/null -w '%{url_effective}\n' "https://$APP_HOST/"https://accounts.google.com/o/oauth2/auth?client_id=...&redirect_uri=https%3A%2F%2Fingress-nginx-controller.ingress-nginx.<cluster-id>...%2F_cfke-oauth2-proxy%2Fcallback&...Now open https://$APP_HOST/ in a browser. You should be sent to Google, sign in, and arrive back at the application, which prints the address you signed in with.
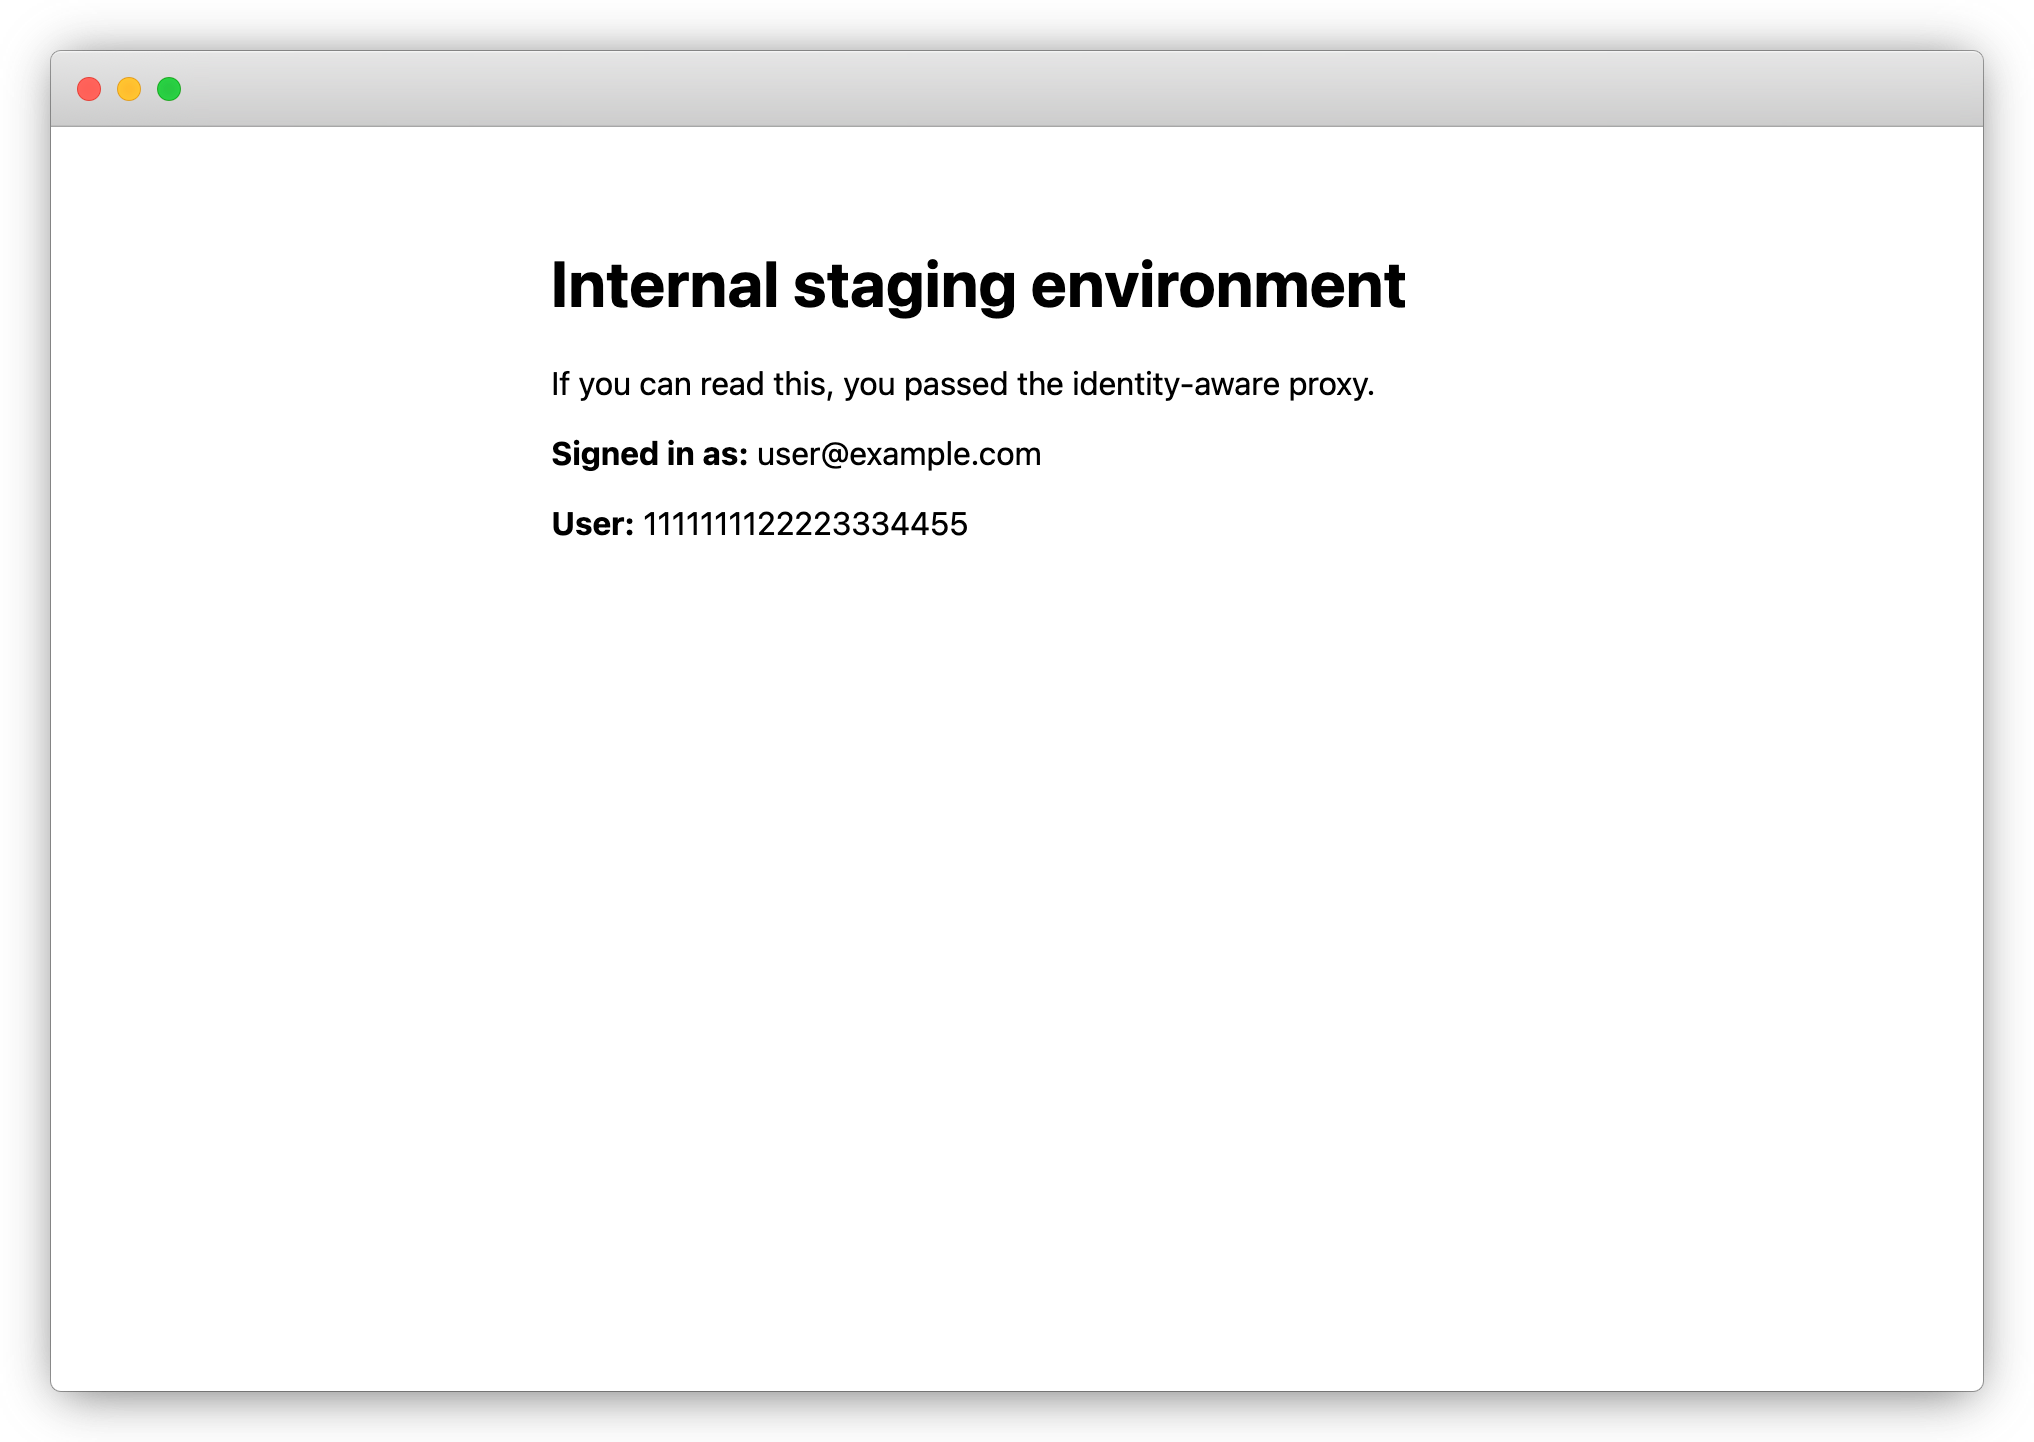
The address on that page is not hard-coded anywhere. It is the X-Auth-Request-Email header, set by oauth2-proxy from the Google identity and copied into the upstream request by the auth-response-headers annotation. Seeing it populated confirms the whole path: Google authenticated the person, oauth2-proxy validated the session, and NGINX passed the identity to the application.
What someone outside your organisation sees
Sign in with a Google account outside the domain in email_domains and the request is refused:
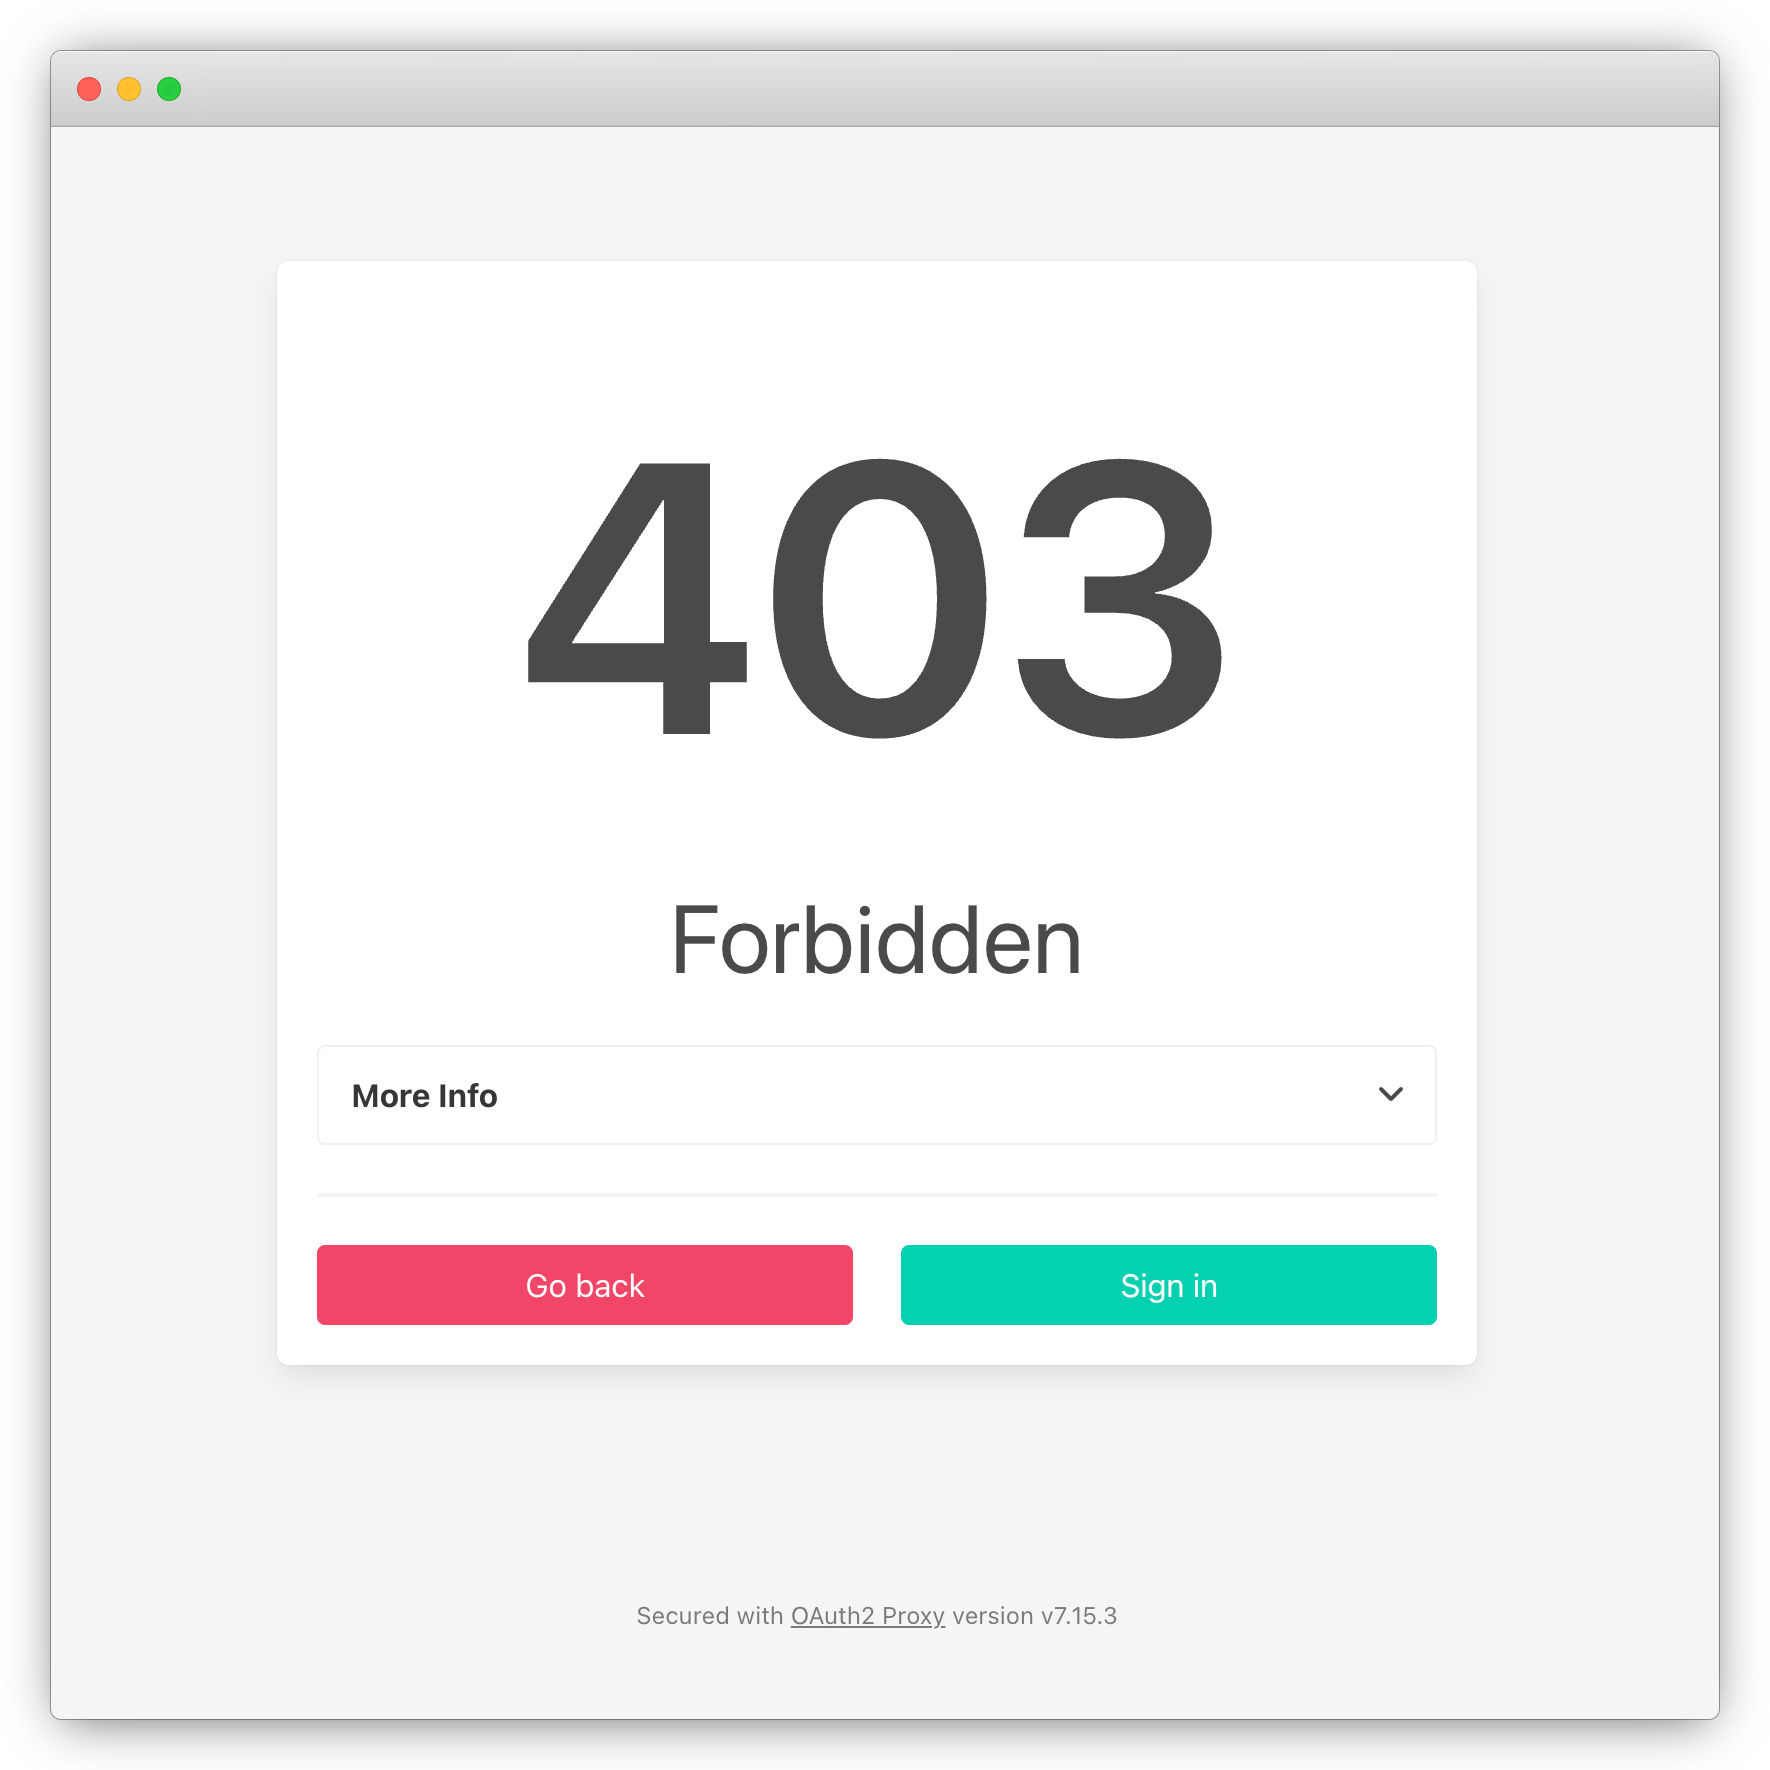
This is worth triggering once deliberately, because it shows the two checks are independent. Google authenticated that account perfectly well; the sign-in succeeded and a token came back. oauth2-proxy then compared the address against email_domains and refused it. If you had relied only on the consent screen being set to Internal, or only on email_domains, a misconfiguration in either one would be the difference between a 403 and an open staging environment.
Note that the person reaches this page after signing in, so they learn the service exists. If that matters, an IP allow list in front of the Ingress keeps unknown clients from seeing anything at all.
Narrowing who gets in
email_domains admits everyone in your Workspace, which is usually too broad for an admin panel.
By explicit address. Provide an allow list file and reference it with authenticated_emails_file. Suitable for a small, stable set of people.
By Google Group. Set google_group to restrict access to members of one or more groups. This requires a Google service account with domain-wide delegation so oauth2-proxy can query the Directory API, and is the option that scales, because group membership is already managed by whoever handles onboarding. See the oauth2-proxy Google provider documentation for the service account setup.
Per application. One oauth2-proxy enforces one policy. When different applications need different audiences, deploy a second oauth2-proxy under its own path prefix with its own rules, and point the stricter applications’ auth-url at it.
What this does and does not give you
It is worth being precise about the boundary.
It gives you: no unauthenticated request reaches the application; access tied to your identity provider, so revoking a Workspace account revokes everything at once; the signed-in identity available to the application as a header; and a single place to change policy.
It does not give you:
- Authorisation inside the application. The proxy answers “who is this”, not “what may they do”. Anyone who passes gets the same access unless the application implements roles.
- Protection for non-HTTP traffic. Databases and SSH need the VPN approach.
- Protection if the application is reachable another way. A
LoadBalancerservice on the same workload bypasses the Ingress entirely. Keep protected applications onClusterIP. - Trustworthy headers on their own.
X-Auth-Request-Emailis only meaningful because it arrives via the Ingress Controller. If a pod can reach the application directly, it can set that header itself. Use NetworkPolicies to restrict ingress to the application namespace, and do not treat the header as proof of identity for anything sensitive without additional verification.
Cleaning up
helm uninstall oauth2-proxy -n oauth2-proxy
kubectl delete namespace oauth2-proxy
kubectl delete namespace demo
Delete the OAuth client in Google Cloud Console if it was only for this guide. There are no DNS records to remove, since the guide uses the hostname CFKE already provides.
Next steps
- Restrict traffic between namespaces with network policies so protected applications cannot be reached directly. CFKE runs Cilium, so network policies are enforced out of the box.
- Read the oauth2-proxy configuration reference for other providers: Microsoft Entra ID, Okta, Keycloak, GitHub and GitLab all work the same way.